If your iCloud is full, new photos, videos, and data won’t sync or be backed up to iCloud, and iCloud Mail and Drive will stop working. You won’t be able to send or receive iCloud emails, and your devices won’t receive updates across your iCloud services. You can resolve this by freeing up space by deleting old files, upgrading to a larger iCloud+ plan, or offloading data to a computer. What Happens When iCloud Storage is Full
- No Backups: Your devices will stop backing up to iCloud, meaning you won’t have new data backed up to recover if you lose your device.
- No Syncing: New photos, videos, and files won’t upload to iCloud Photos or iCloud Drive.
- Stops Updates: Data in iCloud apps, such as notes and files, won’t stay up to date across your devices.
- Email Issues: You won’t be able to send or receive new emails with your iCloud email address.
How to Fix a Full iCloud Storage
- Free Up Space:
- Delete Unnecessary Files: Remove old photos, videos, and documents from iCloud Photos, iCloud Drive, and other iCloud apps to create space.
- Check “Recently Deleted” Folder: Look in the “Recently Deleted” folder within the Photos app, as files there still take up space.
- Offload Data: Move large files, like videos, to a computer or external hard drive and then delete them from your device and iCloud.
- Upgrade Your Storage Plan:
- Purchase a larger iCloud+ plan to get more storage space.
- Manage Your Storage:
- Regularly review your storage usage to prevent it from becoming full again.
- Ensure that iCloud Photos is turned on to automatically sync and manage your photos across your devices.
To fix iCloud, first check Apple’s System Status page to ensure there isn’t an outage. If there’s no outage, try restarting your device and signing out of your Apple ID and back in. If the issue persists, update your device’s operating system (iOS, macOS, etc.) and ensure you have a stable internet connection. For locked accounts, follow the steps on Apple Support to unlock it. 1. Check for Outages and Internet Connectivity
- Verify iCloud status: Go to Apple’s System Status page to see if there are any active issues or scheduled maintenance for iCloud.
- Ensure stable internet: Make sure your device has a strong Wi-Fi or cellular data connection.
2. Restart Your Device and Re-sign In
- Restart your iPhone or iPad: A simple restart can often resolve temporary glitches.
- Sign out and back in: Go to your device’s settings, sign out of your Apple ID, restart your device, and then sign back in to refresh the connection to iCloud.
3. Update Your Device Software
- Update your operating system: Go to your device’s settings (Settings > General > Software Update on iPhone/iPad, or System Settings on Mac) and install any available updates for iOS, iPadOS, or macOS.
4. Address Locked Accounts or Terms & Conditions
- Unlock a locked account: If you see a message that your Apple ID is locked, you’ll need to follow the steps provided on Apple’s support site to unlock it.
- Accept new terms and conditions: You may need to review and accept new terms for Apple services to continue using iCloud.
5. Check for Screen Time Restrictions
- Allow account changes: If iCloud settings are grayed out, check your device’s Screen Time settings. Navigate to Settings > Screen Time > Content & Privacy Restrictions > Accounts and ensure it’s set to Allow.
iCloud+ costs range from $0.99/month for 50GB to $9.99/month for 2TB, with higher-tier plans also available for increased storage. All iCloud+ plans include premium privacy features like iCloud Private Relay and Hide My Email, and offer storage for photos, videos, and files across your Apple devices. You also get a free 5GB iCloud storage tier, but this does not include the premium features. iCloud+ Pricing (U.S. Dollars)
- 50GB: $0.99 per month
- 200GB: $2.99 per month
- 2TB: $9.99 per month
- Higher-tier plans: Options for 6TB and 12TB are also available for even more storage.
What’s Included All iCloud+ plans offer:
- More storage than the free 5GB tier.
- Privacy features such as iCloud Private Relay, Hide My Email, and support for Custom Email Domains.
- Support for HomeKit Secure Video.
- The ability to share your storage and features with family members.
To create an iCloud account, you need a name, birth date, existing email address or a new @icloud.com email, a strong password, and a phone number for verification. You can start the process on an Apple device’s Settings or the App Store, or from any web browser by visiting appleid.apple.com. Information you’ll need:
- First and Last Name
- Birth Date
- Country or Region
- An existing email address: or a new @icloud.com email that you will create during the process
- A strong password: (at least eight characters, with a number and uppercase/lowercase letters)
- A phone number: for identity verification
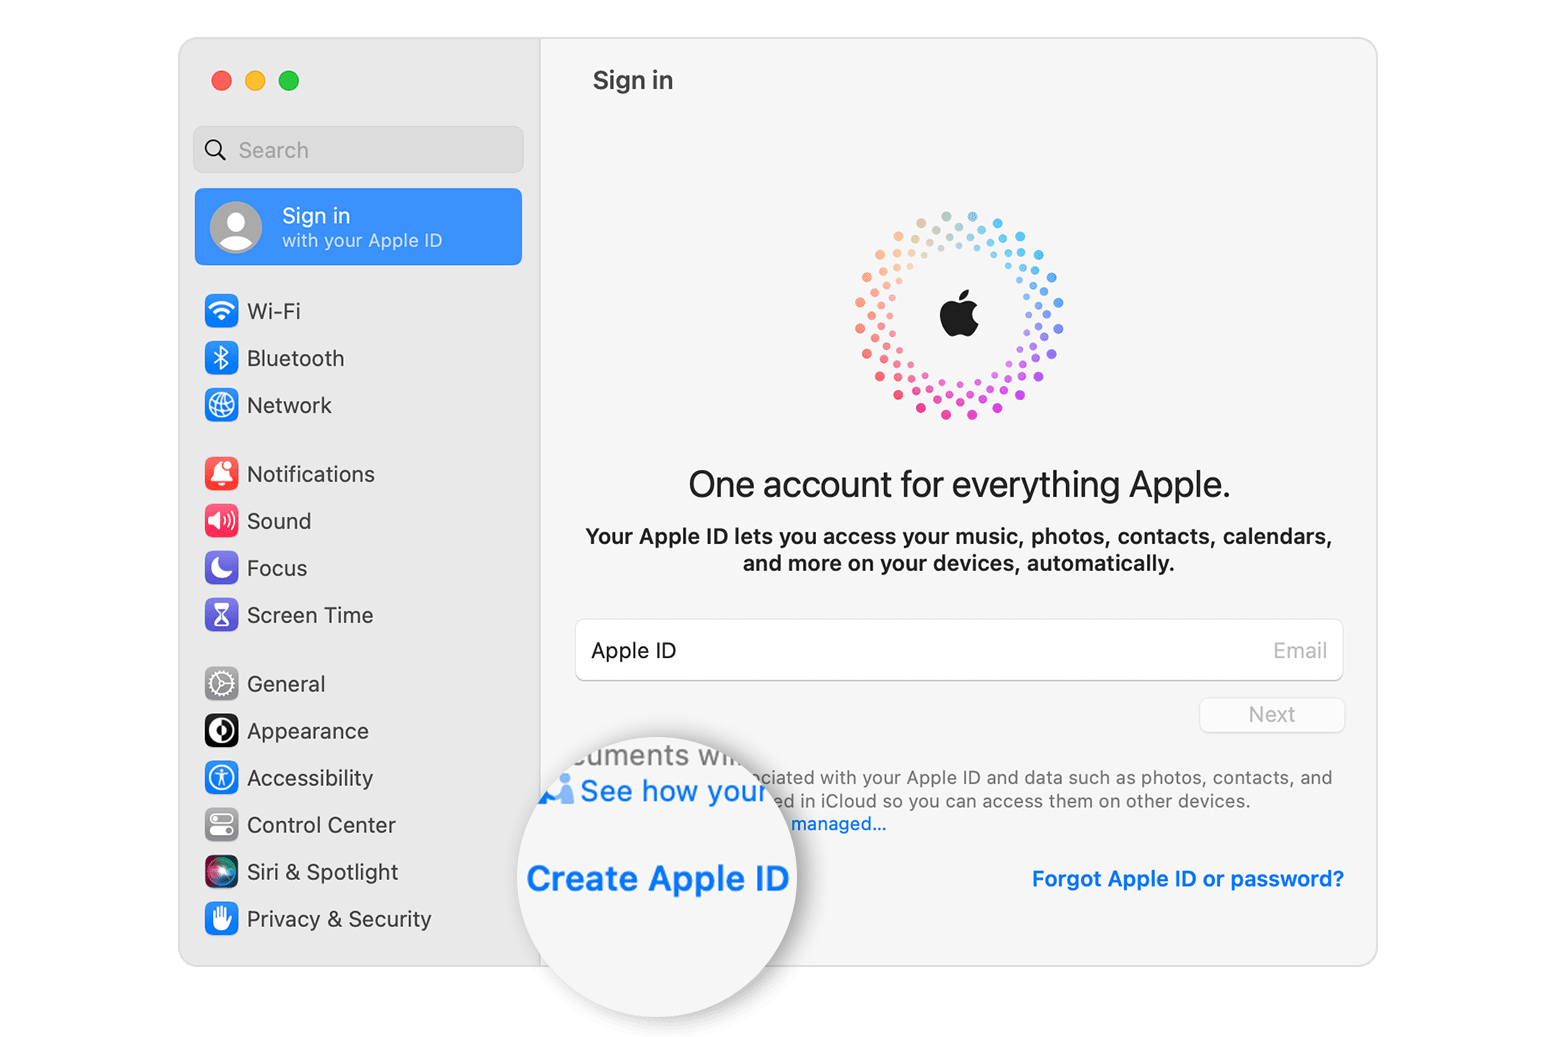
Steps to create an account:
- Visit the Apple ID website: Open a web browser and go to account.apple.com.
- Start the creation process: Click on the option to create an Apple ID or account.
- Enter your information: Fill in your name, birth date, and country or region.
- Provide your email or create a new one: You can use an existing email address, or select the option to create a new iCloud email address.
- Create a password: Enter and confirm a strong password for your account.
- Verify your phone number: Enter and confirm your phone number to verify your identity and help with account recovery.
- Agree to Terms and Conditions: Review and agree to the terms and conditions.
- Verify your email address: Check your email for a verification message from Apple and click the link to verify your email address.
Once verified, you’ll have an Apple ID, which is also your iCloud account, and you can begin using iCloud services.
На сайті iCloud.com можна користуватися програмами iCloud і переглядати документи та дані в підтримуваному браузері на будь-якому пристрої.
Перейдіть на icloud.com/mail, а потім увійдіть у свій Обліковий запис Apple (за необхідності). Натисніть «Створити е‑адресу» й дотримуйтесь інструкцій на екрані …
Як створити Apple ID через браузер? · Перейдіть на сайт applied.apple.com. · Виберіть функцію “Створити Apple ID”. · Дотримуйтесь підказок на …
відкриваємо на своєму пристрої web-браузер, припустимо Google Chrome або Safari;; вводимо в адресному полі http://icloud.com; натискаємо на …